


Home
/
Electrics—New & Featured—In Stock & Ready to Ship
/
Whynter Upright Compressor Ice Cream Maker with Stainless Steel Bowl & Churn Blade
Whynter Upright Compressor Ice Cream Maker with Stainless Steel Bowl & Churn Blade
Quantity
-
Detail
Summary
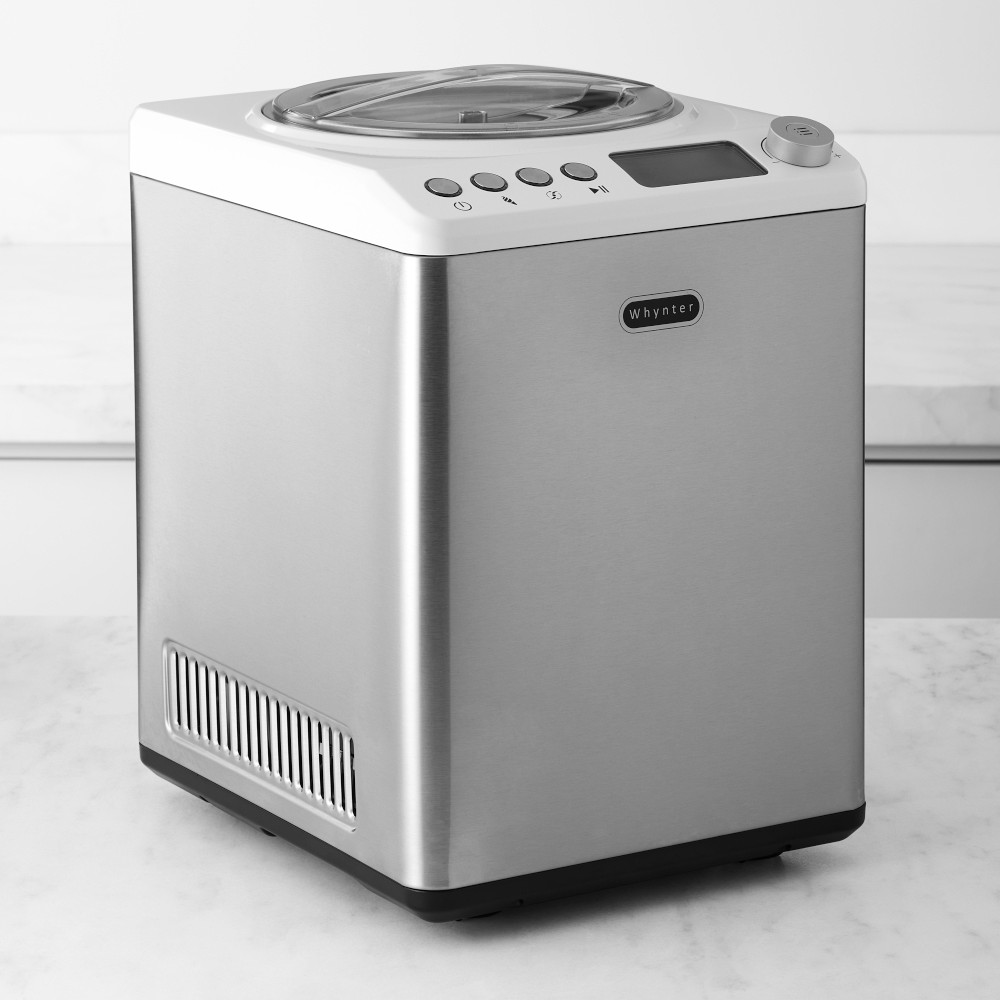
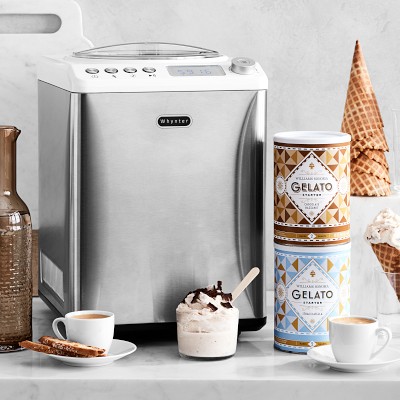
Make homemade frozen treats just the way you like them, using only the ingredients you choose, courtesy of the top-of-the-range ice cream maker. It's capable of making up to 2.5 quarts of dessert in a single batch, including rich and creamy ice cream, gelato, sorbet and even slushy drinks – perfect for parties and entertaining. With a powerful built-in compressor freezer that chills mixture from room temperature, stainless-steel churn blades and mixing bowl, it's a premium model with functions including consistency control and yogurt incubation.
- High-end automatic ice cream maker with compressor freezer – no pre-freezing required.
- Ice cream mode chills ingredients to -0.4°F to -31°F and features Motor Protection function that shuts off machine to prevent damage if mixture freezes solid.
- Consistency control function allows you to set firmness of ice cream.
- Yogurt making mode incubates ingredients between 104°F and 110°F.
- Compact, sleek stainless-steel design.
- Makes up to 2.5 quarts in a single batch.
- Easy to use, with LCD controls and timer.
- Removable stainless-steel bowl and churn blades for easy cleaning.
- Includes BPA-free plastic ice-cream scoop and recipes.
Dimensions & More Info
- 12 1/2" x 10 3/4" x 15 3/4" high.
- 31 lb. 8 oz.
- 250W.
Additional Information
- Model #ICM-255SSY.
- High-efficiency CFC-free compressor.
- ETL certified.
- Made in China.
Use & Care
Care
- Batch bowl, mixing paddle, and lid must be cleaned and sanitized before initial use and after each use, unless unit is going to be used again within one hour. Failure to do so may allow residue of processed material to collect on internal seals of drive assembly, rendering them ineffective. With repetitive batch-processing, cleaning bowl between batches will prolong life of drive assembly.
- Use only low-foaming, powdered detergents formulated for cleaning dishware and cooking utensils. These products can be purchased from restaurant and commercial food service suppliers.
- Lid and mixing paddle are dishwasher safe; hand-wash batch bowl.
- Use brush to clean inside bottom hole of mixing paddle before placing in dishwasher. Pre-clean stubborn food deposits with brush and presoak in detergent solution if necessary. Rinse well.
- To sanitize, use regular, unscented bleach diluted with water between 50°F and 120°F. Sanitizing dilutions are based on hypochlorite concentration of bleach. The dilutes for 2 commonly available bleach concentrations are hypochlorite 5.25% – 3 tsp. bleach per gallon of water; hypochlorite 8.25% – 2 tsp. bleach per gallon of water. Wet soft cloth or sponge with bleach dilution listed above and wipe down interior and exterior of lid, bowl and mixing paddle. Place bowl into freezing chamber, install paddle and fill with sanitizing solution to above mixing paddle. Cover with lid to prevent splashing, and run on Mixing Only mode for 2 minutes. Empty bowl. Immerse lid in sanitizing solution and soak for 2 minutes.
- Do not rinse after sanitizing is completed. Drain sanitizing solution and allow parts to air-dry.
- Housing and freezing chamber must be cleaned and sanitized before first use, and whenever unit has come into contact with food.
- Remove vent cover on rear of unit.
- Wipe down exterior housing and freezing chamber with wet cloth. Remove and clean under vent cover if necessary.
- Wipe entire exterior housing and freezing chamber with soft cloth or sponge that has been dampened with sanitizing solution (use only sanitizing solutions recommended above) and wrung out to avoid any excess solution running into housing vents in base.
- Do not immerse housing in washing solution, rinse water or sanitizing solution. Allow to air-dry. Reinstall vent cover on rear of unit.
-
Customer ReviewsNo comments
You May Also Like
ADD TO CART
Title
$ 0.00
ADD TO CART
ADD TO CART
Title
$ 0.00
ADD TO CART
ADD TO CART
Title
$ 0.00
ADD TO CART
ADD TO CART
Title
$ 0.00
ADD TO CART